Tag Profile for AWS CloudSpend
A Tag Profile provides customized labels that group user-defined parameters such as resourceLocation, service, and resource. It allows you to manage your cloud costs efficiently. There are both user-defined tags and AWS-generated tags. Each tag has a unique value and you can combine multiple tags using AND/OR conditions while creating a Tag Profile.
Table of contents
- Benefits of a Tag Profile
- System tags
- Creating a Tag Profile
- Editing a Tag Profile
- Deleting a Tag Profile
- Use cases
Benefits of a Tag Profile
Some of the key benefits of a Tag Profile include:
- Managing cloud data in an easy and efficient manner.
- Breaking down and analyzing cloud costs from a bird's-eye view.
- Group, filter, and understand cloud costs using different parameters like resourceLocation, service, accounts, resource types, and meter category.
- Reuse and combine two or more tags to create a Business Unit or Budget to reuse in the future.
System tags
CloudSpend provides the following system-generated tags for AWS:
- usageType
- operationType
- usageInfo
- serviceName
- dataTransferType
- instanceType
- usageSubType
- availabilityZone
- regionName
Creating a Tag Profile
To create a Tag Profile:
- Go to the CloudSpend console.
- From the left navigation pane, select Admin.
- Click and expand the Profiles tab.
- Select Tag Profile to see a list of all the existing tag profiles created.
- Click Add Tag Profile to add a new tag profile.
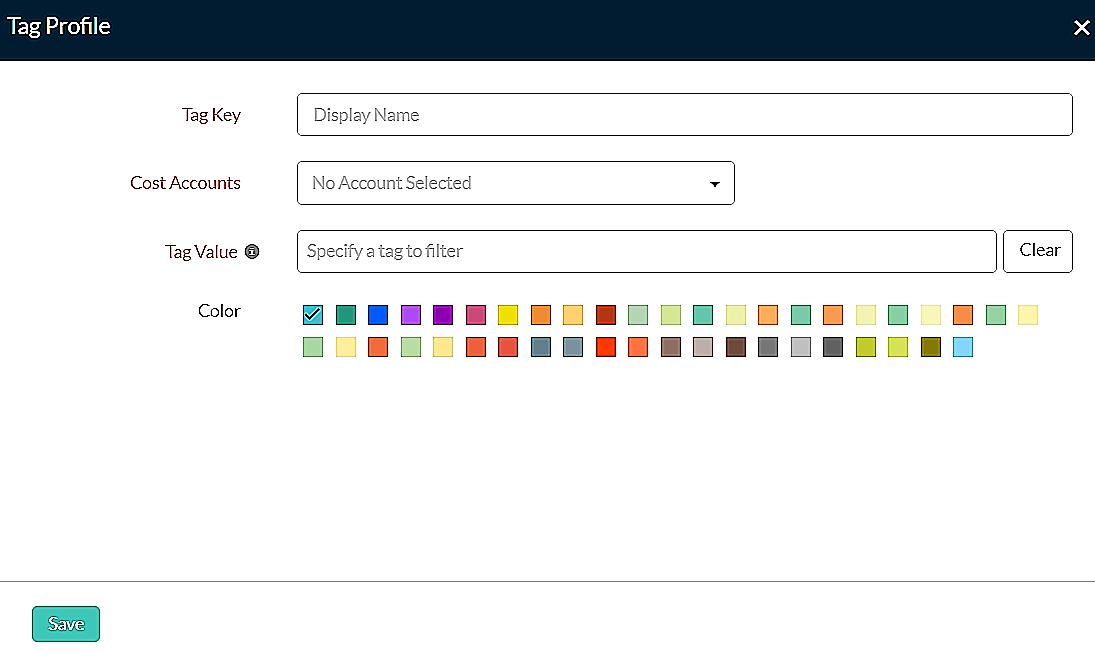
- In the Tag Profile dialog box, enter the following details:
Field Description Tag Key The tag name Cost Accounts The desired cost account (selected from the drop-down list) Tag Value The applicable tag for filtering Color The preferred Tag Profile color 
- Click Save.
Editing a Tag Profile
To edit a Tag Profile:
- Go to the CloudSpend console.
- From the left navigation pane, select Admin.
- Click and expand the Profiles tab.
- Select Tag Profile to see a list of all the existing tag profiles created.
- Click the hamburger icon corresponding to the tag profile you wish to edit.
- Click Edit and edit the necessary fields.
- Click Save to save the changes.
Deleting a Tag Profile
To delete a Tag Profile:
- Follow steps 1-5 from the Editing a Tag Profile section.
- Click Delete to delete the Tag Profile.
Use cases
The following examples explain different scenarios where tags are used with the AND/OR conditions while creating a Tag Profile.
Example 1
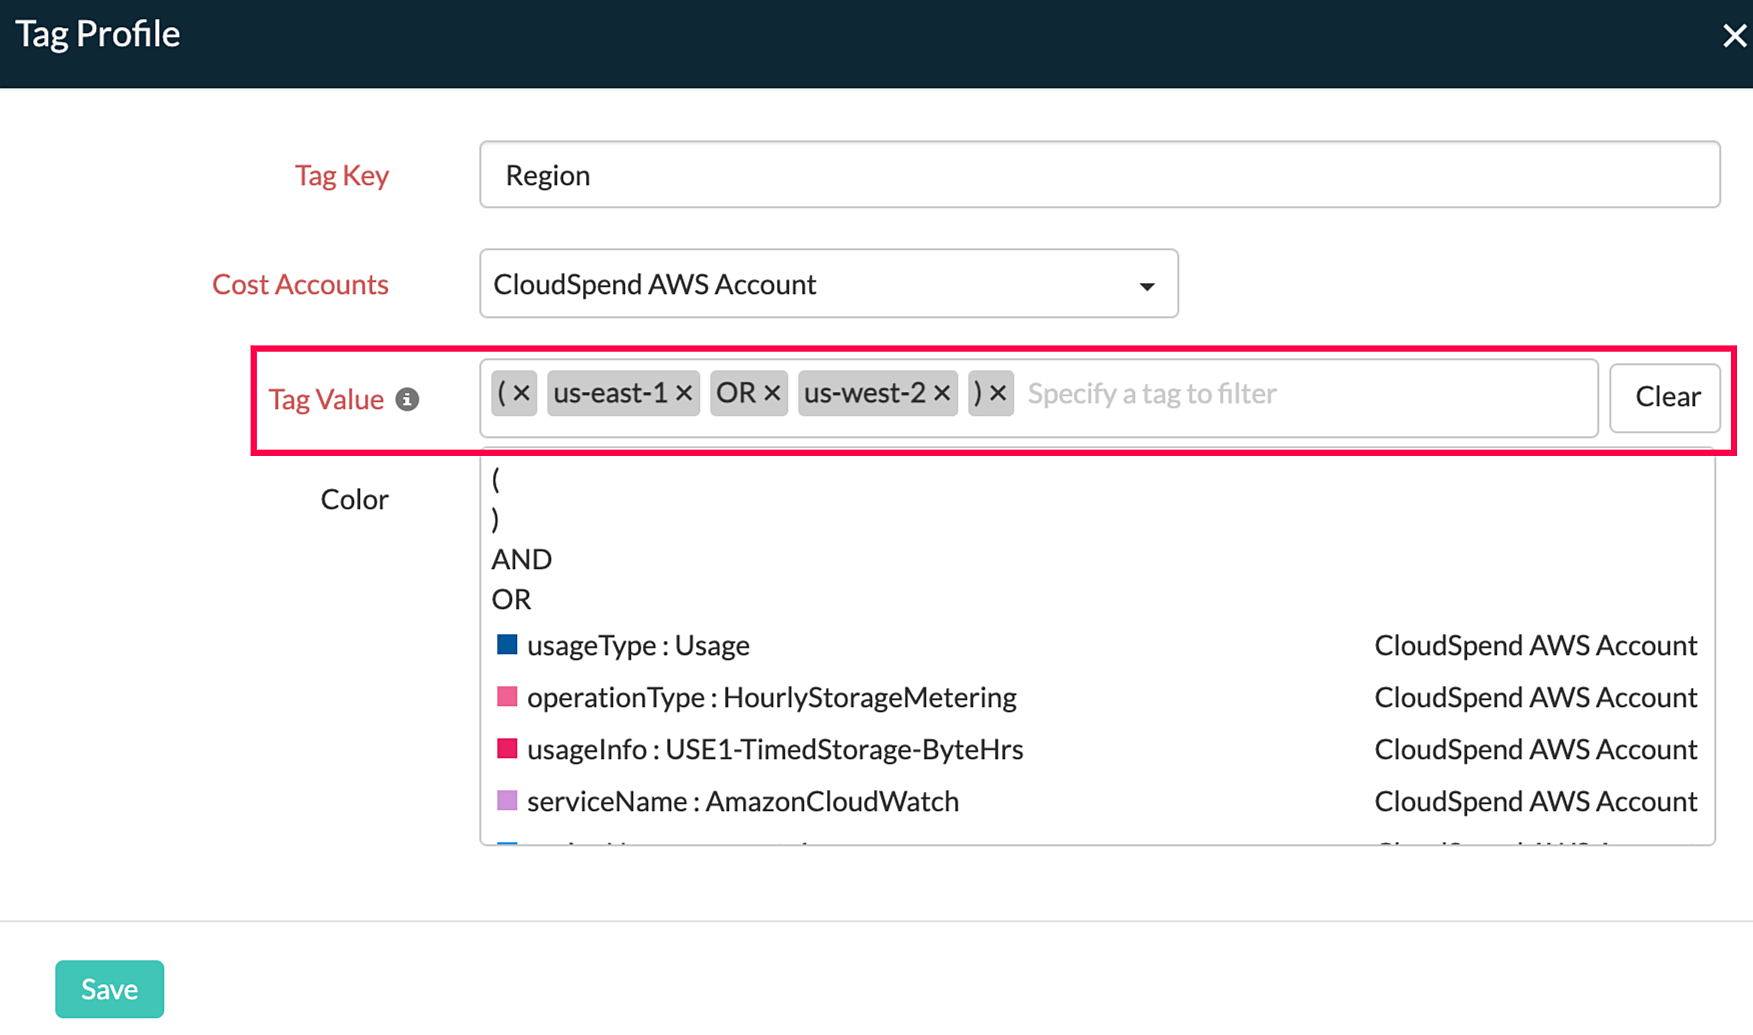
If you want to filter cost data for a US East region account, you'll use the regionName:us-east-1 tag. If you want to filter for both US East and US West regions, you'll use the regionName:us-east-1 tag and regionName:us-west-2 tag. Here, we use the OR condition and enter the tags. Thus, we can get data for the resources present in the East US or West US region.

Example 2
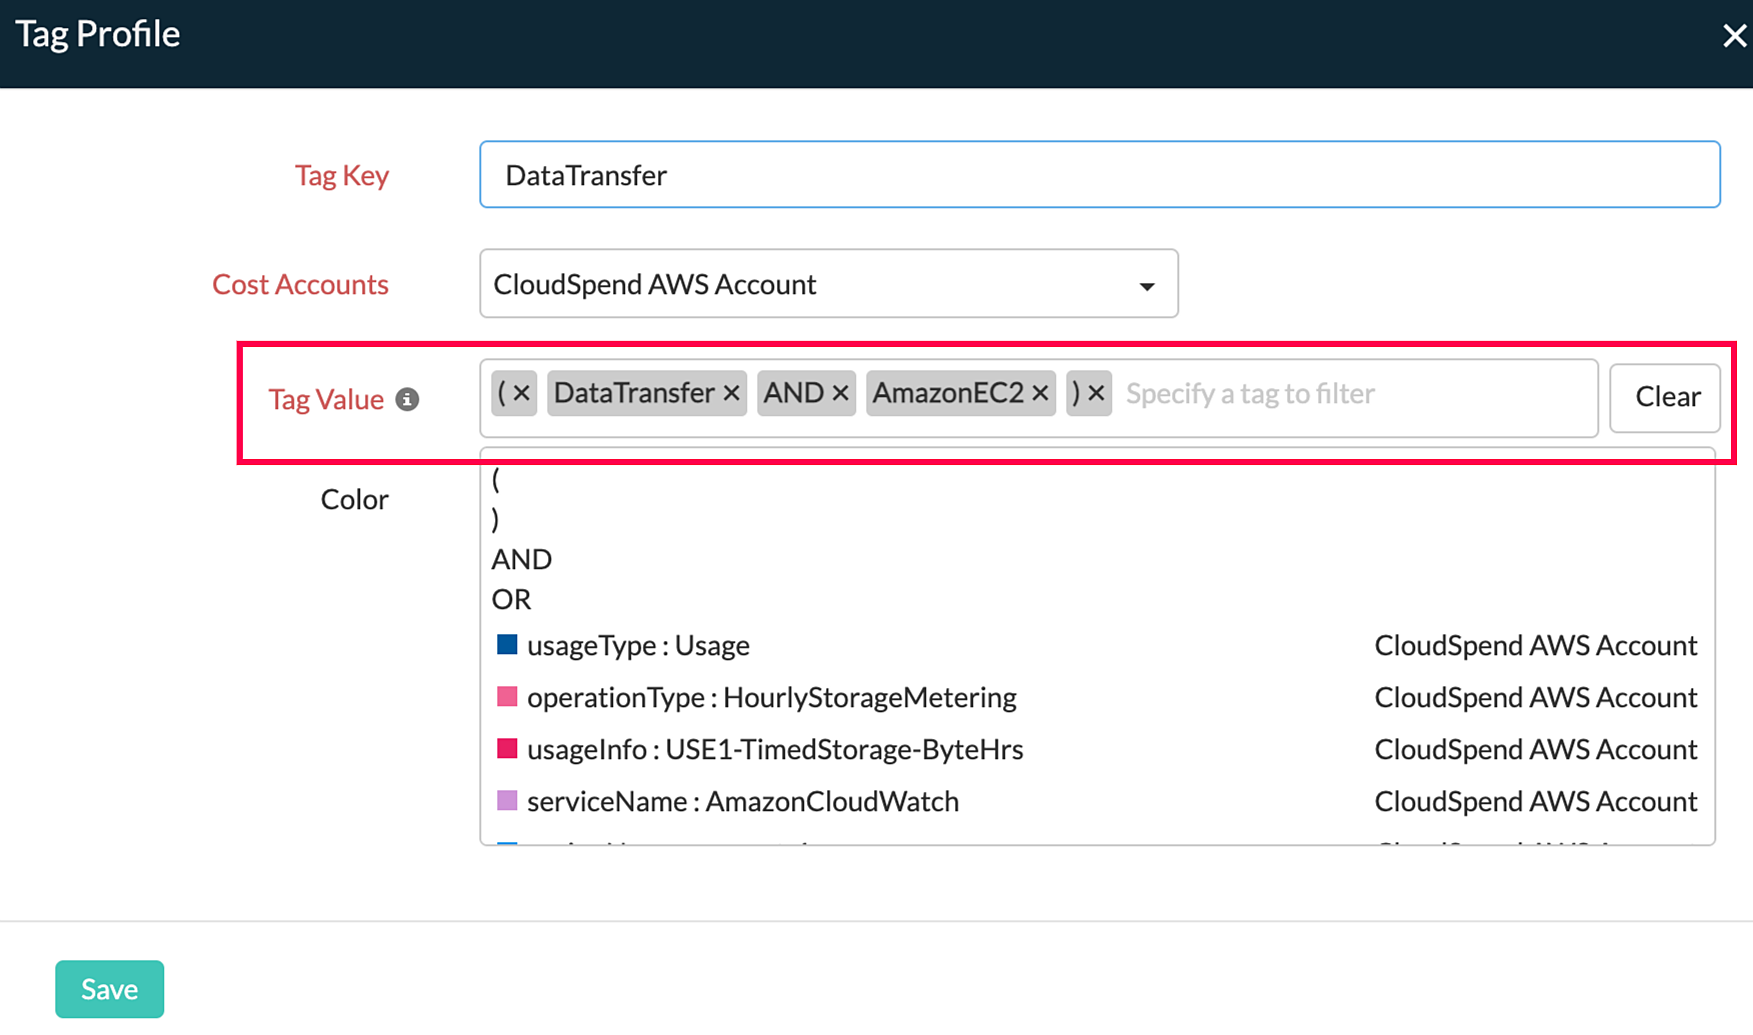
Say you want to filter EC2 service data with two tags using the DataTransfer tag key for an account of your preference. In this scenario, let's use the operationType:Data Transfer tag and serviceName: AmazonEC2 tags. Here, the AND condition is used, so that the filter is applied based on both the operationType and serviceName tags.

Example 3
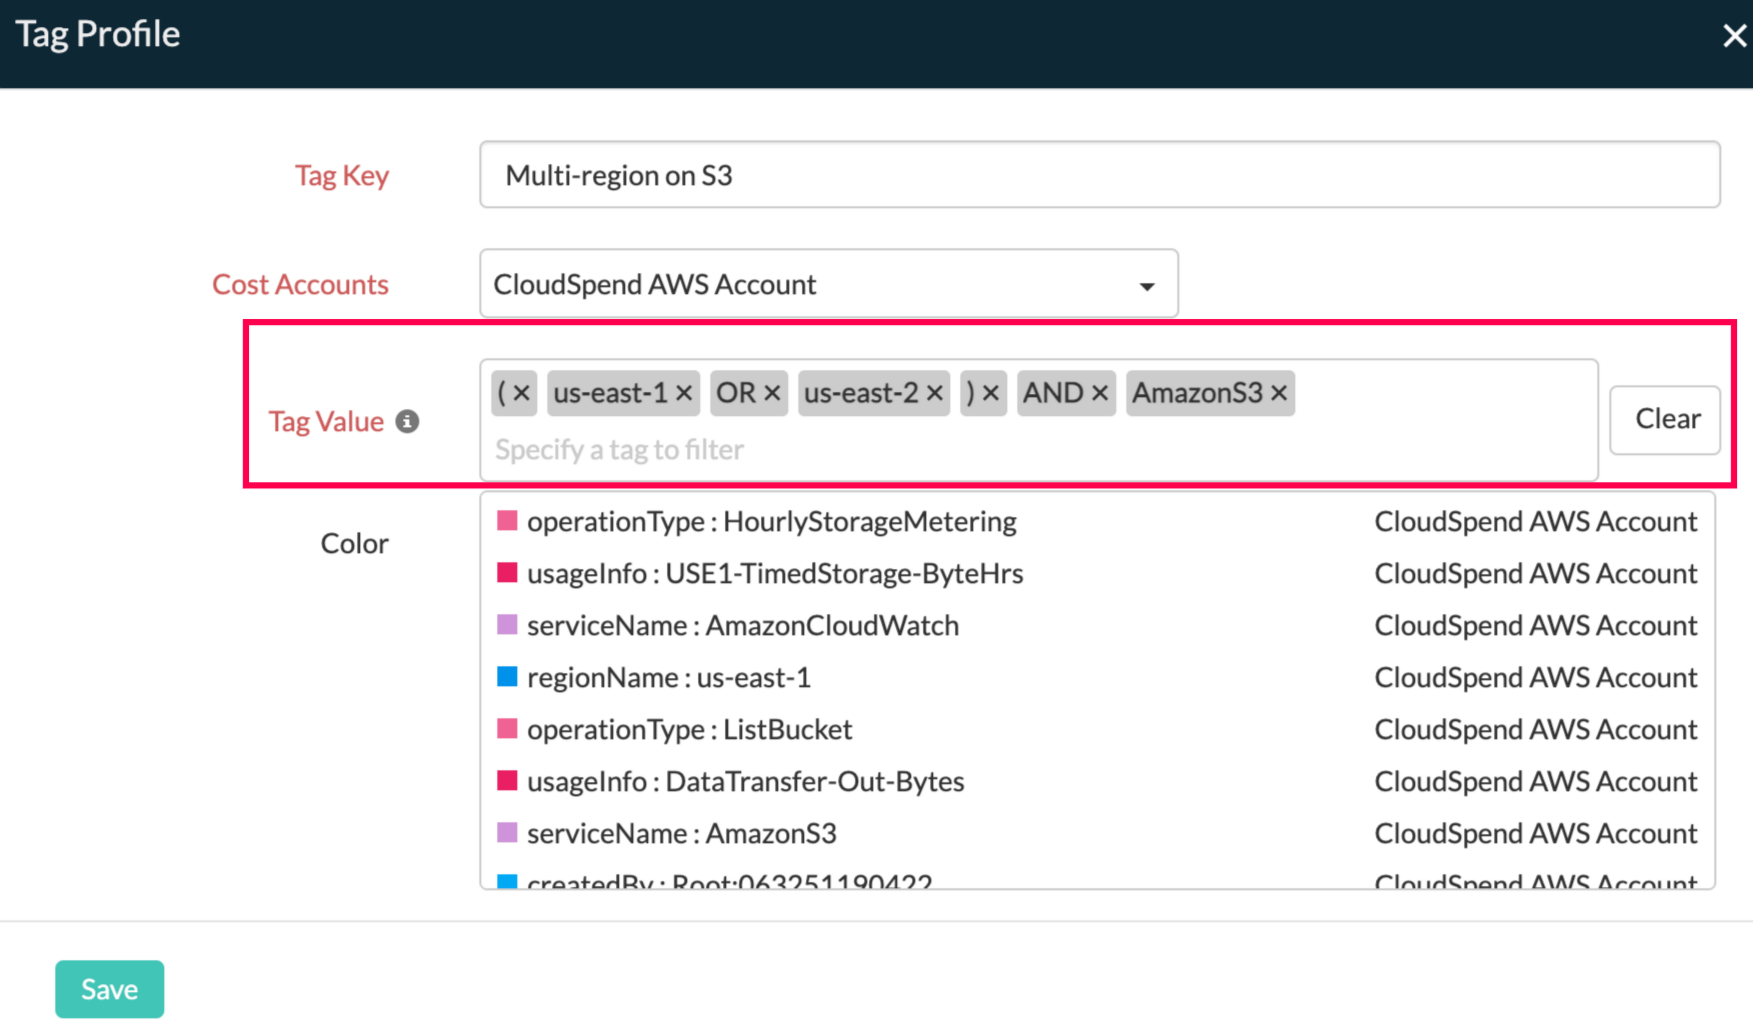
You now want to add multiple tags for an account of your preference using both the AND/OR conditions. For instance, let's use the regionName:us-east-1 tag and regionName:us-east-2 and the serviceName: AmazonS3 tag with parenthesis to group and retrieve the data according to the logical operations order.
In this case, enter these tags as: (regionName:us-east-1 OR regionName:us-east-2) AND serviceName: AmazonS3. The application will display the data for either regionName:us-east-1 or regionName:us-east-2 and data for serviceName: AmazonS3 for the applicable account.
